Guide
Golf Simulator Impact Screens: How to Choose, Install and Clean
Swinglix may earn a commission when you buy through links on this page, at no extra cost to you. Learn more
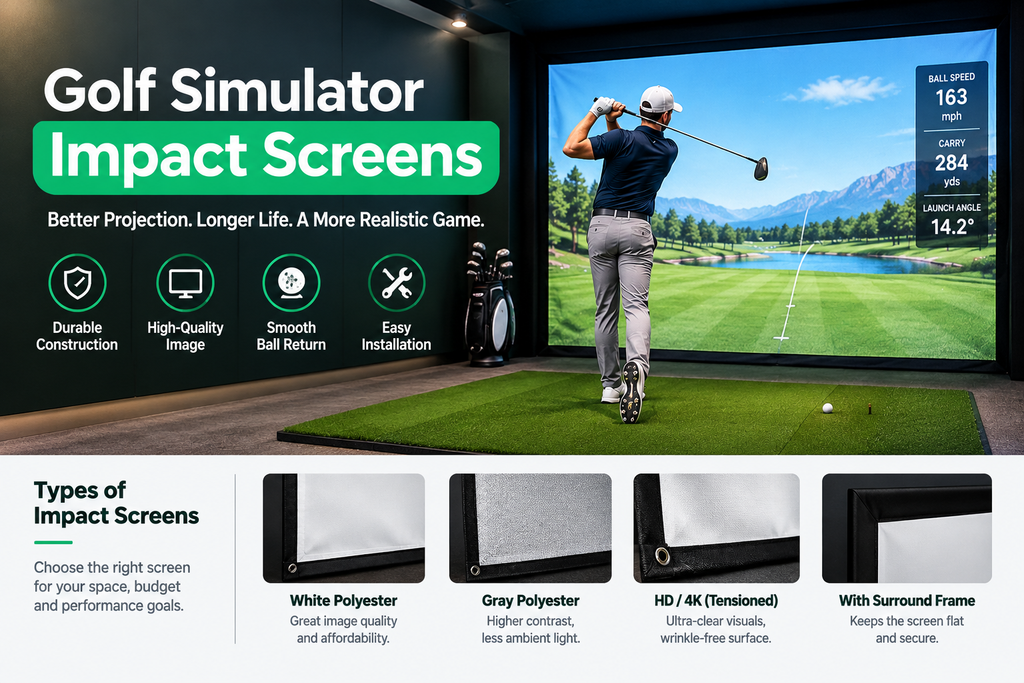
A golf simulator impact screen does two jobs: it stops a golf ball travelling at full speed, and it shows the projected course. The best impact screens are tough, quiet, show a sharp picture and stay flat when properly tensioned. Expect to pay roughly $200–$600 for a budget screen and $600–$1,500 or more for a premium one, depending on size.
This guide shows you how to choose the right screen, install and tension it step by step, clean it without damage, and fix the most common problems: wrinkles, bounce-back, noise, hot spots and wear. It’s part of our at home golf simulator setup guide.
Key Takeaways
- Impact screens are usually multi-layer woven polyester designed to absorb a ball’s energy.
- Premium screens are quieter, show a sharper image and last longer.
- An ordinary projector screen isn’t designed to be hit and will tear.
- Hang the screen with even tension, not drum-tight, and a gap of several inches to a foot from the wall.
- The ball typically sits 8–12 feet from the screen.
- Clean balls and gentle spot cleaning keep the picture bright for longer.
What Are Golf Simulator Screens Made Of?
Most impact screens are made from densely woven polyester, often in two or three layers, sometimes with a smooth white face for a brighter image. The weave absorbs the ball’s energy so it drops down instead of bouncing back hard. Edges are reinforced, with grommets, sleeves or loops for attaching the screen to the frame.
Projector screen vs impact screen
An ordinary projector screen isn’t designed to be hit and will tear or deform. A golf simulator needs an impact screen built to absorb balls. If you already own a projector, pair it with a proper impact screen.
Golf simulator without a screen
You can practise without an impact screen: hit into a net and watch your shots on a TV, tablet or phone. Many budget setups start this way, and a net-and-screen combination lets you add a projector later. For a projected picture and the full simulator feel, you need an impact screen. See cheap golf simulator setups.
How to Choose an Impact Screen
Work through these steps in order; each one narrows the choice.
- Measure the space for the screen. Measure the inside of your enclosure frame or, if you’re building one, the wall space available. Subtract a few inches on each side for bungees and tensioning. Result: the maximum screen size.
- Match the shape to your projector. 16:9 suits most modern projectors and wide, low rooms; 4:3 is taller and shows more sky; 16:10 is in between. A mismatch leaves part of the screen unused or the picture spilling off the edges.
- Decide how much you’ll use it. A few hours a week suits a budget screen; daily use or several players suits a premium, multi-layer screen that wears more slowly.
- Decide how much noise matters. Shared walls, sleeping children or a home office nearby point to a premium screen known for being quiet, plus a baffle.
- Check the attachment method. Grommets with bungees are the most common and easiest to tension evenly; make sure the screen suits your frame.
- Check the warranty and whether the maker sells replacement screens in the same size, so you can swap a worn screen easily later.
| Feature | Why it matters |
|---|---|
| Durability | Stronger, thicker screens survive more drives before wearing through |
| Noise | Quieter screens make a softer “thud”, important in homes and shared walls |
| Image quality | A smoother, brighter surface gives a sharper picture; some weaves show a visible texture |
| Bounce-back | Good screens absorb energy so balls drop rather than rebound |
| Size and shape | Should match your enclosure and projector’s aspect ratio (4:3, 16:10 or 16:9) |
| Attachment | Grommets, sleeves or loops affect how evenly it tensions |
Impact screen size guide
| Room width | Typical screen width | Suggested aspect ratio |
|---|---|---|
| 10–12 ft | About 8–10 ft | 4:3 or 16:10 |
| 12–15 ft | About 10–12 ft | 16:10 or 16:9 |
| 15 ft+ | About 12–16 ft | 16:9 or wider |
Leave room for the frame, tensioning and side netting, and check the screen height against your ceiling. Then match the projector to the screen; see projector setup.
How far should you be from the screen?
The ball is typically placed 8–12 feet from the impact screen. Closer than about 8 feet increases the chance of balls bouncing back and makes the picture feel cramped; much further wastes room depth. Your launch monitor may have its own recommended distance, so check its manual first. See space requirements for full room dimensions.
Retractable screens
Retractable screens roll up into a housing above the hitting area, freeing the room for other uses: parking in the garage, or a spare room that doubles as an office. They cost more than fixed screens, and some are motorised. Roll them up only when dry and clean, and check tension each time you lower them.
Golf Simulator Screen Prices and Where to Buy
Screen prices depend mostly on size, material and whether you buy the screen on its own or as part of an enclosure.
How much are golf simulator screens?
| Type | Rough price | Good for |
|---|---|---|
| Budget impact screen | $200–$600 | Occasional use, starter setups |
| Premium impact screen | $600–$1,500+ | Daily use, quiet homes, sharp images |
| Custom size / retractable | Higher | Unusual rooms, multi-use spaces |
Prices depend heavily on size. See golf simulator costs for the full setup.
Best golf simulator impact screens: where to buy
Impact screens are sold by simulator retailers in standard and custom sizes. Well-known sources include:
- Carl’s Place: a range of impact screens from budget to premium, in many sizes.
- Shop Indoor Golf and Rain or Shine Golf: screens sold alone and in enclosure kits.
- Online marketplaces: many budget screens; check the material, number of layers and owner reviews carefully.
Screens also come with most enclosure kits and simulator packages.
How to Install a Golf Simulator Screen
Time: 1–2 hours. People: two. You’ll need: a step ladder, the bungees or ball bungees supplied, and a tape measure.
- Check the frame first. It should be square (both diagonals of the opening measure the same), level and fixed so it can’t move. A screen can’t hang flat on a frame that’s out of square.
- Unpack and relax the screen. Unfold it on a clean floor, face down, and let creases relax for a few hours if it arrived folded. Don’t iron it unless the maker says you can.
- Find the top. Some screens have a marked top or a different edge; check the label or instructions.
- Attach the two top corners, then the middle of the top edge, then the points in between, through every grommet. Leave bungees slightly loose for now.
- Attach the sides, starting at the middle of each side and working up and down, then the bottom, starting in the middle and working outwards.
- Set the tension. Go round again, tightening each bungee a little at a time, like tightening wheel nuts, so no single point pulls harder than the rest. Aim for a flat surface with no wrinkles that still gives when you push it.
- Check the gap behind the screen: several inches to a foot from the wall or back netting, more for fast swing speeds. Push the centre of the screen firmly; it must not touch anything behind.
- Sort out the bottom edge. Balls should drop and roll back towards you gently or collect at the base. Some setups tuck the bottom edge under turf or add a ball-return ramp; follow your enclosure’s design.
- Add a baffle behind the screen if you want it quieter and safer.
- Turn on the projector and look for wrinkles or waves, which show up clearly in the picture. Adjust the nearest bungees to remove them.
Check: hit half-swing wedges at the centre. The ball should drop near the base of the screen, not fly back past the mat. Building the whole enclosure? See our DIY enclosure guide.
How to Clean a Golf Simulator Screen
Ball marks, rubber from the mat and dust build up over time and dull the picture. Always check your screen maker’s care instructions first; this is a safe general method.
How often: a quick brush every few weeks; spot cleaning when marks start to show in the picture. You’ll need: a soft brush, two clean microfibre cloths, a bowl of lukewarm water with a few drops of mild dish soap, and a step ladder.
- Turn off the projector so you can see marks clearly and aren’t working in its beam. A torch shone across the screen at a low angle shows marks well.
- Dry-brush first, from top to bottom, to lift loose dust and fibres. Many light marks come off at this stage.
- Test in a corner. Dampen a cloth in the soapy water, wring it out well, and dab a small area near an edge. Let it dry and check for discolouring or changes to the surface before going further.
- Spot-clean marks by dabbing, not scrubbing. Work from the outside of each mark inwards so you don’t spread it. Rubbing hard can roughen the face and leave a dull patch in the picture.
- Remove soap by dabbing with a second cloth dampened in clean water.
- Let it dry completely before hitting again; damp fabric is weaker and marks more easily.
- Re-check the tension once dry, as damp fabric can sag or tighten slightly.
Avoid: bleach, solvents, strong cleaners, pressure washers and abrasive pads, unless your screen maker specifically approves them. They can damage the coating and weave.
How to keep the screen clean in the first place
- Clean your balls: wash them in warm soapy water every so often and dry them before use. Dirty balls are the main cause of marks.
- Don’t hit balls with heavy pen marks or alignment lines that can transfer ink.
- Brush the hitting mat and replace a worn hitting strip; loose fibres and rubber get carried onto the screen.
- Keep dust down in garages by covering the screen when you’re not using it for long periods.
Common Screen Problems and How to Fix Them
Wrinkles or a wavy picture
- Turn on the projector with a bright, plain image (a sky or a white test screen) so wrinkles show.
- Find the bungees nearest the wrinkle. Wrinkles usually point towards the bungee that’s too tight, or away from one that’s too loose.
- Loosen the tight side a little, or tighten the loose side, then re-check. Small changes go a long way.
- If the whole screen is wavy, re-tension evenly from the centre of each edge outwards.
- Still wavy? Check the frame is square; an out-of-square frame pulls the screen unevenly.
Balls bouncing back too hard
- Check the ball distance from the screen; under about 8 feet makes bounce-back worse.
- Loosen the screen slightly, especially across the middle. A drum-tight screen acts like a trampoline.
- Increase the gap behind the screen so the screen can flex.
- Add a baffle behind the screen to soak up energy.
- Check what’s around the screen: hard frame poles and walls send mishits back. Pad them.
See our golf simulator safety guide for more on bounce-back.
The screen is too loud
- Listen to where the noise comes from. A sharp bang usually means the ball, or the screen, is hitting the wall or frame behind; a dull thud is the screen itself.
- For bangs, increase the gap behind the screen and pad the frame.
- Hang a baffle behind the screen.
- Add acoustic panels or heavy curtains on nearby walls, and a rug or rubber flooring under the bay.
- If it’s still too loud, consider upgrading to a premium screen known for being quiet.
A bright patch (hot spot) in the picture
A hot spot is a bright area where the projector’s light reflects back towards you. Move or tilt the projector slightly so it isn’t pointing straight back at your eye line, reduce the projector’s brightness if it’s set very high, and if it’s still noticeable, consider a screen with a more matte face.
Dull or patchy picture
Clean the screen as above, block light from windows and lamps that fall on the screen, and check the projector’s picture settings. See projector setup.
How Long Does an Impact Screen Last, and When Should You Replace It?
It depends on the screen, how hard and how often you hit, and the balls you use. Premium screens used regularly can last for years; budget screens used daily may need replacing sooner.
How to check your screen for wear
- Every month or so, look closely at the main impact area, usually low and slightly off-centre.
- Shine a torch from behind the screen in a dark room. Thin, worn areas let much more light through than the rest.
- Look for broken threads, fraying or small holes.
- Watch the ball: if balls start passing through, or bouncing back much harder than before, the screen is worn.
Replace the screen as soon as you see a hole or a ball goes through; a worn screen can fail suddenly. Some owners extend a screen’s life by spreading wear: varying the ball position on the mat, or turning the screen if its design and the maker allow. Some makers offer repairs or patches for small damage.
FAQ
What is the best impact screen for a golf simulator?
The best screen for you is durable, quiet and gives a sharp picture, in the right size and shape for your enclosure and projector. Premium screens from simulator specialists cost more but last longer and are quieter.
How much does a golf simulator screen cost?
Roughly $200–$600 for a budget screen and $600–$1,500 or more for a premium screen, depending on size.
How far should the golf ball be from the screen?
Typically 8–12 feet. Check your launch monitor’s recommended distance.
How tight should a golf simulator screen be?
Tight enough to be flat with no wrinkles, but not drum-tight: it should give when you push the centre and spring back without touching anything behind. Too tight increases bounce-back and wear.
How do you clean a golf simulator screen?
Check the maker’s instructions first. Generally, dry-brush the screen, test a corner, then dab marks with a cloth dampened in mild soapy water, remove the soap with a clean damp cloth and let it dry fully. Avoid harsh chemicals and scrubbing.
Can I use a regular projector screen for a golf simulator?
No. Regular projector screens aren’t built to be hit and will tear. Use an impact screen designed for golf.