
Guide
Golf Simulator Projector Setup: Mounting, Throw Distance and Connecting to Your PC
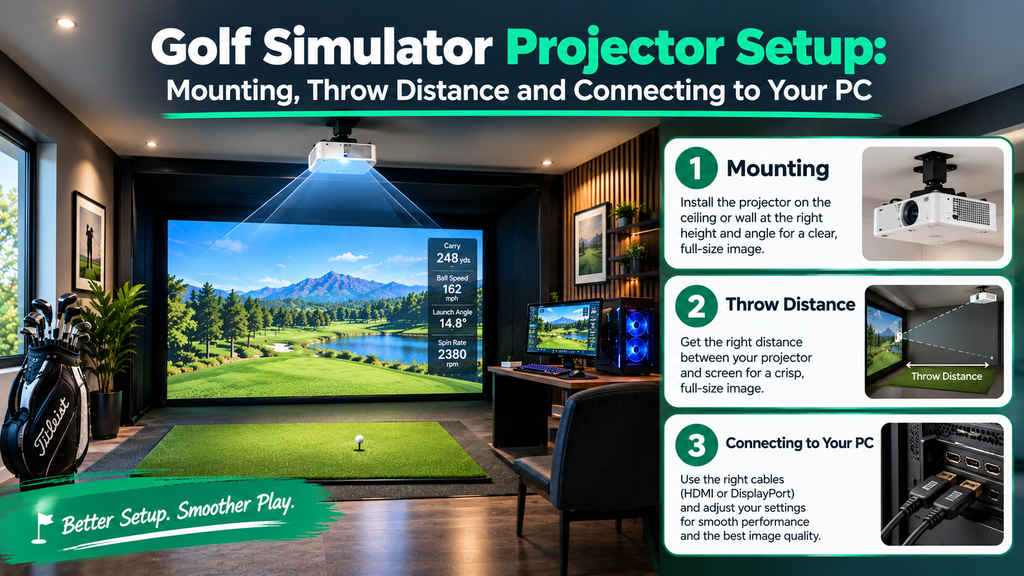
Getting the projector right is the difference between a crisp, full-size picture and a dim, distorted one with your shadow in it. To set up a golf simulator projector, you need to work out the throw distance for your screen, choose a mounting position out of your swing path, mount it securely, connect it to your PC, and fit the picture so it fills the impact screen exactly.
This guide walks you through each step in order, with the measurements, settings and checks you need, and a troubleshooting section for the most common projector problems. It’s part of our guide to the best projector for a golf simulator.
Key Takeaways
- Throw distance = throw ratio × picture width; check it before buying and before drilling.
- Test the position before you drill: temporarily place the projector, turn it on, and check for shadows and swing clearance.
- Mount it into joists, out of the club’s path, usually above or just in front of the hitting area.
- Fit the picture in this order: position, lens shift, zoom, screen fit, and keystone only for small corrections.
- Use a cable rated for your resolution, and an active, fibre or HDMI-over-Ethernet solution for long runs.
Before You Start
| Item | Details |
|---|---|
| Time | 2–3 hours, including picture adjustment |
| People | Two: one to hold, one to fix |
| Tools | Tape measure, stud finder, drill and driver, step ladder, spirit level, painter’s tape |
| Parts | A ceiling mount rated for your projector’s weight, an HDMI cable long enough for the run (or an extender), power at the mounting point |
| Do first | Hang and tension the impact screen, and place the hitting mat; the projector is set up to fit them |
Projectors and ceiling height
Low ceilings make projector placement harder, because the projector has to be out of the club’s path. Short-throw projectors mounted closer to the screen, or floor units in a protective box, help. Check how high a ceiling you need, and see aspect ratios, lighting and electrical requirements.
Where Should the Projector Go?
| Position | Pros | Cons |
|---|---|---|
| Ceiling, above or slightly behind the golfer | Most common; out of the way | Golfer can cast a shadow if too far back; needs ceiling height |
| Ceiling, between golfer and screen (short throw) | Minimal shadows | Must be clear of the club and skied shots; may need a guard |
| Floor or low box in front of the golfer | Works with low ceilings | Needs a protective housing; can be hit by low shots |
| Behind the golfer (long throw) | Uses cheaper standard-throw projectors | Needs a very deep room; golfer’s shadow is likely |
Short-throw projectors are popular because they can be mounted close to the screen, reducing both shadows and the distance the light travels.
Step 1: Calculate the Throw Distance
Throw distance = throw ratio × picture width. The throw ratio is in the projector’s specifications; the picture width is the width of your impact screen.
| Picture width | 0.5 ratio | 0.8 ratio | 1.2 ratio |
|---|---|---|---|
| 8 ft | 4 ft | 6.4 ft | 9.6 ft |
| 10 ft | 5 ft | 8 ft | 12 ft |
| 12 ft | 6 ft | 9.6 ft | 14.4 ft |
- Measure the screen width inside the frame, edge to edge.
- Multiply by the throw ratio. For a 10-foot screen and a 0.5 ratio, the lens needs to be about 5 feet from the screen.
- Measure from the lens, not the mount. Mark that distance on the ceiling with tape, measured out from the screen.
- Check the vertical offset. Most projectors don’t project straight ahead: the picture sits above the lens (or below it when ceiling-mounted upside down). The manual or the maker’s online throw calculator shows how high the lens must be relative to the top of the screen.
- Allow for zoom. If the projector has a zoom lens, its throw ratio is a range; the calculator shows the distance range that fits your screen.
Check: the marked spot is clear of your backswing and follow-through, and of the path of skied shots. If it isn’t, you need a projector with a shorter throw ratio, or a different screen size.
Step 2: Test the Position Before You Drill
This 15-minute test avoids holes in the wrong place.
- Hold the projector at the marked spot temporarily: on a tall shelf, a step ladder top or a helper’s hands, at the planned height, with the projector flipped the way it’ll be mounted.
- Turn it on with a bright, plain image and check the picture lands on the screen and is roughly the right size.
- Stand at address on the hitting mat and swing slowly. Look for your shadow on the screen at address, the top of the backswing and the finish.
- Check clearance with your driver at the top of the backswing; the projector and mount must be well clear.
- Adjust and repeat: if your shadow appears, move the projector forward (closer to the screen), higher, or slightly to the side.
Step 3: Mount the Projector
- Find the joists with a stud finder at the tested position, and mark them. Many mounts have an adjustable plate, so you can fix to a joist and slide the projector into position.
- Use a mount rated for your projector’s weight, with enough tilt and drop to reach the height you need.
- Drill pilot holes and fix the ceiling plate into the joist with the screws supplied, or into solid timber blocking. Don’t rely on plasterboard alone.
- Attach the projector to the mount and tighten it so it can’t drift when a ball hits the screen or the frame vibrates.
- Set ceiling mode in the projector’s menu (often called ceiling, front-ceiling or inverted) so the picture shows the right way up.
Check: push the projector gently; it shouldn’t move or sway.
Step 4: Run Power and HDMI
- Power: plan an outlet near the projector before mounting. A licensed electrician can add a ceiling outlet; new wiring usually needs a permit (see our permit guide).
- Choose the HDMI cable for the resolution: for 4K at 60 Hz, use a cable certified for 18 Gbps (sold as “Premium High Speed”) or better.
- For long runs (for example over about 25–30 feet across the ceiling), use an active or fibre-optic HDMI cable, or an HDMI-over-Ethernet (HDBaseT) extender, so the signal doesn’t drop out.
- Route the cables in trunking or through the ceiling, out of the hitting area and away from where a ball could catch them.
- Leave a little slack at the projector so the plug isn’t pulled when the mount is adjusted.
Step 5: Connect to the PC and Set the Resolution
- Connect the HDMI cable to the PC’s graphics card output, not the motherboard’s HDMI port, so the graphics card does the work.
- Set Windows to the projector’s native resolution: Settings → System → Display → choose the projector → Display resolution. Native resolution is the projector’s real pixel count, such as 1920 × 1080 for 1080p or 3840 × 2160 for 4K.
- Choose how displays work together under “Multiple displays”: Duplicate (same picture on the monitor and projector) or Extend (software on the projector, controls on a monitor).
- Set the same resolution and your screen’s aspect ratio in the simulator software, then use its display settings to size the picture to the screen.
Using a tablet or phone app instead? Mirror it to the projector with an HDMI adapter or wireless casting, though wireless can add lag. Choosing a computer? See golf simulator PC requirements.
Step 6: Fit the Picture to the Screen
Work in this order; each step gives a sharper picture than fixing it later with keystone.
- Square the projector to the screen physically: centred, and not twisted left or right.
- Use lens shift (if your projector has it) to move the picture up, down or sideways without distortion.
- Use zoom to fit the width.
- Use automatic screen fit if the projector has it.
- Use digital keystone only for small corrections, as it softens the picture.
- Focus on a detailed image, checking the centre and all four corners.
Aim to fill the screen exactly, with the picture just touching the edges or a little beyond into the black border. Slightly smaller looks unfinished; much bigger spills light onto the walls and enclosure. If the projector and screen have different aspect ratios, decide whether to fill the width (leaving some screen empty top or bottom) or fit the screen with the software’s picture-size settings.
Check: a straight horizon in the software looks straight across the whole screen, and text is sharp in every corner.
Step 7: Set the Picture for Golf and Check for Shadows
With the picture fitted to the screen, finish by tuning the image for golf and making sure nothing gets in its way.
Choose picture settings for golf
- Start with the projector’s brightest accurate mode, or a golf or sports mode if it has one.
- Turn off motion smoothing, which can blur the moving ball.
- Set the colour temperature so grass looks natural, not neon.
- In a bright room, raise brightness before contrast; in a dark room, an eco or lower-brightness mode can reduce fan noise.
Check for shadows and protect the projector
- Shadow check: stand at address and swing slowly. If your shadow appears, move the projector forward, higher or slightly offset, ideally with a short-throw lens.
- Swing check: keep it well outside the swing arc and above the likely flight of skied shots.
- Protection: in low or tight rooms, use a projector cage or protective housing, or a net or canopy below it.
- Cooling and dust: keep vents clear and the room reasonably cool and dust-free.
See also the golf simulator safety guide.
Troubleshooting Projector Problems
| Problem | Likely cause | What to do |
|---|---|---|
| No picture (“no signal”) | Wrong input, loose cable, PC output on a different port | Select the right HDMI input; reseat both ends; use the graphics card’s port; try a short cable to rule out the long one |
| Picture drops out or flickers | Long passive cable or cable not rated for the resolution | Use a certified cable, active or fibre cable, or HDBaseT extender |
| Picture upside down or mirrored | Projection mode not set | Set ceiling (inverted) mode, or rear mode only for rear projection |
| Trapezoid shape | Projector tilted or off-centre | Square the projector physically; use lens shift; small keystone only |
| Picture too small or too big | Throw distance doesn’t match the screen | Use zoom; adjust software picture size; re-check throw distance |
| Blurry corners | Heavy keystone, focus, or screen not flat | Reduce keystone; refocus; re-tension the screen |
| Black bars or stretched picture | Resolution or aspect ratio mismatch | Match Windows and software to the projector’s native resolution and your screen ratio |
| Washed-out picture | Room light or low brightness mode | Block windows; light the golfer, not the screen; use a brighter mode |
| Your shadow on the screen | Projector too far back or too low | Move forward, higher or offset; consider short throw |
| Picture shakes when the ball hits | Projector on the enclosure frame, or loose mount | Tighten the mount; mount to the ceiling rather than the frame |
Common projector setup mistakes
- Buying a standard-throw projector for a short room.
- Drilling before testing the position for shadows and swing clearance.
- Relying on heavy keystone correction, which softens the picture.
- Using a passive HDMI cable that’s too long, causing dropouts.
- Wrong resolution or aspect ratio in Windows or the software.
- No protection in a tight room.
Prefer to leave it to a pro? A golf simulator installer can mount, wire and align the projector for you.
FAQ
Where should a golf simulator projector be mounted?
Usually on the ceiling, above or slightly in front of the hitting area, out of the swing path and positioned so you don’t cast a shadow. Short-throw projectors make this easier. Test the position before drilling.
How do I connect my golf simulator to a projector?
Run an HDMI cable from the PC’s graphics card to the projector (use an active or fibre cable or an extender for long runs), set Windows to the projector’s native resolution, then set the simulator software to the same resolution and your screen’s aspect ratio.
How far should a projector be from a golf simulator screen?
Multiply the projector’s throw ratio by the picture width. A 0.5 throw ratio fills a 10-foot-wide screen from about 5 feet, measured from the lens.
How do I stop my shadow appearing on the screen?
Mount the projector further forward, higher or slightly offset, ideally with a short-throw lens, so your body isn’t between it and the screen.
Why is my golf simulator projector picture upside down?
A ceiling-mounted projector hangs upside down, so set its projection mode to ceiling (inverted) in the menu.