
Guide
Golf Simulator Safety: Netting, Padding and Preventing Bounce-Back
Swinglix may earn a commission when you buy through links on this page, at no extra cost to you. Learn more
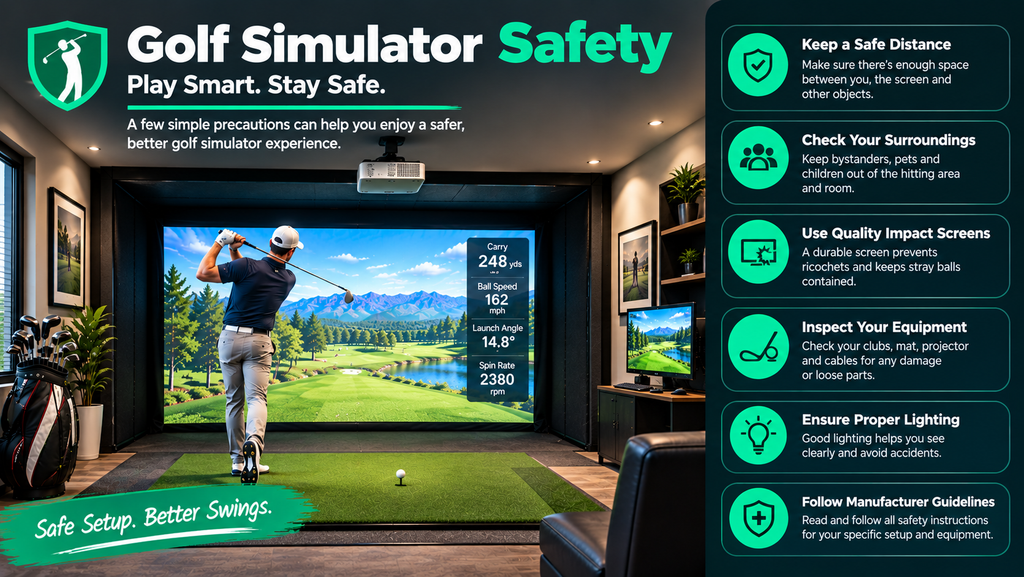
A golf ball can leave the club at well over 100 mph, and indoors it has nowhere to go but the screen, the net or something you’d rather it didn’t hit. A safe golf simulator has side and top netting to catch mishits, padding on hard surfaces, the right distance between ball and screen, and protection for the projector, lights and launch monitor. None of it is expensive, and it prevents most damage and injuries.
This guide shows you how to find the danger zones in your room, install golf simulator netting and padding, diagnose and stop bounce-back, protect your equipment, and set simple rules for players, spectators and children. It’s part of our guide to an at home golf simulator setup.
Key Takeaways
- Use side netting or panels on both sides of the hitting area, and a top net or canopy if the ceiling is exposed.
- Pad hard surfaces near the hitting area: walls, frame poles, beams and the floor edge in front of the screen.
- Keep the ball 8–12 feet from the screen and leave a gap behind the screen.
- Protect the projector and lights, and keep the launch monitor out of the line of fire.
- Keep spectators behind the golfer, and start each session with easy shots.
Golf Simulator Safety Checklist
| Risk | Fix |
|---|---|
| Shanks and thin shots hitting side walls | Side netting or enclosure side panels |
| Skied shots hitting the ceiling or lights | Top net or canopy; ceiling padding; protected light fittings |
| Balls bouncing back from the screen | Correct screen tension, gap behind the screen, 8–12 feet ball-to-screen distance |
| Balls rebounding off hard frame parts | Pad exposed poles and frame edges |
| Projector damage | Mount out of the line of fire; use a protective housing or cage if needed |
| Club hitting the ceiling | Check ceiling height; pad the ceiling above the swing area |
| People in the hitting area | Seating and walkways behind the golfer; clear rules |
Planning safety into your room
Safety starts with space. A room that’s too narrow or too low makes mishits more dangerous, because there’s less room for the ball to lose speed and more hard surfaces nearby. Check how much space you need and ceiling height before you build. A professional golf simulator installer can also plan protection for tricky rooms.
Step 1: Map the Danger Zones in Your Room
Before buying netting or padding, find out where mishits will actually go. Time: 20 minutes. You’ll need: painter’s tape, a tape measure and a helper.
- Stand at the hitting position and look left and right. Anything within roughly 45 degrees of the target line on either side, closer than the screen, is in range of shanks, hooks and slices. Mark these areas on the walls with tape.
- Look up. Anything above and in front of you, such as lights, beams, ducts and the projector, is in range of skied shots and the club itself.
- Look behind. Anything within reach of your backswing and follow-through: shelves, a TV, a doorway.
- Look at the floor in front of the screen. Low, thin shots hit the bottom of the frame and the floor and can skip back.
- List every hard or breakable item in those zones: windows, doors, the TV, the PC, light fittings, frame poles, exposed brick or concrete.
Result: a list of exactly where you need netting, padding or protection. Fix everything on it before full swings.
Step 2: Install Netting
Netting is the cheapest protection and the most important. It goes in three places:
- Side netting: runs from the screen towards the hitting area on both sides, catching shanks, slices and hooks.
- Top netting or canopy: catches skied shots before they reach the ceiling or lights.
- Behind and around the screen: catches balls that miss the screen.
How to hang golf simulator side netting
- Use heavy-duty golf impact netting with a small mesh, so balls can’t push through. Light sports netting isn’t enough.
- Measure the run from the screen edge back towards the hitting area, covering the danger zones you marked. Longer side netting catches more shanks.
- Attach it at the top first, with cable ties, carabiners or hooks about every foot, so it hangs evenly.
- Overlap the screen edge so no ball can slip between the screen and the netting.
- Leave it slightly slack at the bottom. Loose netting absorbs a ball; tight netting bounces it back.
- Check it reaches the floor and the ceiling or canopy, with no gaps at the corners.
Most enclosure kits include side netting; for DIY builds, golf netting is sold by the foot or in panels. See our DIY enclosure guide for fitting netting to a frame.
What is the best net for a golf simulator?
For a setup without a projector, a large, deep practice net with side barriers, so it catches mishits as well as good shots. For a projected setup, an impact screen with side netting is the standard; see impact screens.
Golf simulator with a net and TV
A popular budget setup is a practice net with the launch monitor’s data and ball flight shown on a TV. Keep the TV well outside the net’s side, protected from shanks, or behind the golfer.
Step 3: Add Padding and Wall Panels
Padding softens hard surfaces so balls lose energy instead of flying back.
- Wrap exposed frame poles within reach of a mishit in foam pipe insulation or purpose-made padding, held with tape or cable ties.
- Pad the side walls in the danger zones with foam panels, gym mats or padded wall panels.
- Protect the bottom of the screen frame and the floor edge in front of the screen, where low shots strike.
- Pad the ceiling above the swing area in low rooms, including beams and ducts a club could reach.
- Keep padding slightly soft or loose. Hard, rigid boards send the ball straight back; softer materials absorb it.
Decorative acoustic wall panels can do double duty, reducing noise and improving the look of the room. See wall padding options.
Step 4: Stop Bounce-Back
Bounce-back is the most common safety complaint. Work through these checks in order; most people fix it within the first three.
- Measure the ball-to-screen distance. It should be 8–12 feet. Closer than 8 feet gives the ball less room to lose speed and makes bounce-back much worse.
- Check the screen tension. Press the centre: it should give and spring back. A drum-tight screen acts like a trampoline; loosen it slightly, evenly all round.
- Check the gap behind the screen. Several inches to a foot, more for fast swings. If the screen touches the wall when hit, the ball rebounds off the wall.
- Find what the ball is hitting. Hit a few half-swing shots and watch. If balls come back off the frame, a pole, or the floor in front of the screen, pad that spot.
- Add a baffle, a loose curtain hanging behind the screen, to absorb extra energy.
- Check your balls. Cut or heavily scuffed balls behave unpredictably; use clean, undamaged balls.
Check: after each change, hit five half-wedges and five full shots. Balls should drop at or near the base of the screen, not roll or fly back past the mat. More on screens in our impact screen guide.
Step 5: Protect Your Equipment
Projector
- Mount it high, and forward of or above the hitting area, out of the club’s path. Check with slow swings using your longest club.
- Fix the mount into joists or solid timber.
- In tight or low rooms, fit a protective housing or cage.
- Check it isn’t in the path of skied shots; if it could be, add a canopy or net below it.
See golf simulator projector setup.
Launch monitor
Position camera units beside the ball and radar units behind you exactly as their makers specify, which also keeps them out of the ball’s path. Units beside the ball should sit where a heel or shank won’t hit them. Some makers sell protective covers or guards.
Lights, computer and TV
Use flush or recessed light fittings, or protect hanging lights with cages or netting. Keep the computer and any TV behind the golfer or well to the side, outside the danger zones.
Step 6: Run a Safety Check Before Your First Swing
- Slow swing test: swing your longest club slowly to the top and through to the finish; no contact with the ceiling, lights or walls.
- Screen: tensioned, with a gap behind it.
- Netting: secure, overlapping the screen, no gaps at corners or the floor.
- Equipment: projector, lights and launch monitor out of the line of fire.
- Easy shots first: half-swing wedges, watching where each ball goes after the screen.
- Work up gradually: full wedges, mid-irons, then the driver.
Repeat a quick version of this check whenever you move the mat, the screen or the launch monitor.
Safety Rules for Players, Kids and Families
A safe room only stays safe if everyone follows a few simple rules.
Safety rules for players and spectators
- Only the golfer in the hitting area; everyone else behind a marked line.
- Check behind and around you before every swing.
- Warm up with wedges before full swings.
- Wear proper shoes; socks on turf can slip.
- Keep drinks and phones out of the hitting area.
- Stop if anything is damaged: torn netting, a loose frame or a worn screen.
Safety for kids and families
- Mark a waiting line on the floor with tape, well behind the hitting area, and make “behind the line until it’s your turn” the first rule.
- Supervise: young children should only play with an adult present.
- Use junior clubs sized for each child; they’re easier to control.
- Consider softer balls for very young children, though many launch monitors read them poorly; check your maker’s guidance.
- Store clubs out of reach when the simulator isn’t in use, and turn it off.
Insurance, Outdoor Use and Playing Without a Net
These questions come up once the simulator is built, or when you take it outside.
Home insurance and damage
A well-built simulator rarely causes damage, but it’s worth checking your cover:
- Check whether your home insurance covers accidental damage to the house and to the simulator equipment, which can be valuable.
- Tell your insurer about expensive equipment if your policy has limits on single items.
- Keep receipts and photos of your setup.
- If you charge people to use it, you’ll need business insurance; see starting a golf simulator business.
Outdoor simulator safety
Outdoors, the main risks are balls leaving your property and equipment exposed to weather. Use a large, deep net or enclosure with high side netting, check what lies beyond it (windows, cars, neighbours, paths), and bring electronics inside after play. See outdoor and portable setups.
Can you have a golf simulator without a net?
If you have a full enclosure with an impact screen and side panels, you don’t need a separate net. Without an enclosure, you need a net, ideally with side barriers. Hitting towards a bare wall or an ordinary projector screen isn’t safe.
FAQ
Do I need side netting for a golf simulator?
Yes. Side netting or side panels catch shanks and thin shots that would otherwise hit walls or bounce back. Most enclosure kits include it.
What padding should I use for a golf simulator?
Foam panels, gym mats or padded wall panels on nearby walls, foam wrap on exposed frame poles, and padding along the bottom of the screen and above the swing area if the ceiling is low. Keep it slightly soft so it absorbs rather than rebounds.
How do I stop golf balls bouncing back from the screen?
Keep the ball 8–12 feet away, loosen a drum-tight screen, leave a gap behind it, pad any hard surface the ball is hitting, and add a baffle behind the screen.
How do I protect my projector from golf balls?
Mount it high and forward of or above the hitting area, clear of the club and skied shots, fixed into joists. In tight rooms, add a protective housing or a net or canopy below it.
Are golf simulators dangerous?
They’re safe when set up properly with netting, padding and correct distances, and when only the golfer is in the hitting area. Most problems come from missing side protection or bounce-back.