
Guide
DIY Golf Simulator Enclosure: How to Build One (and the Best Kits)
Swinglix may earn a commission when you buy through links on this page, at no extra cost to you. Learn more
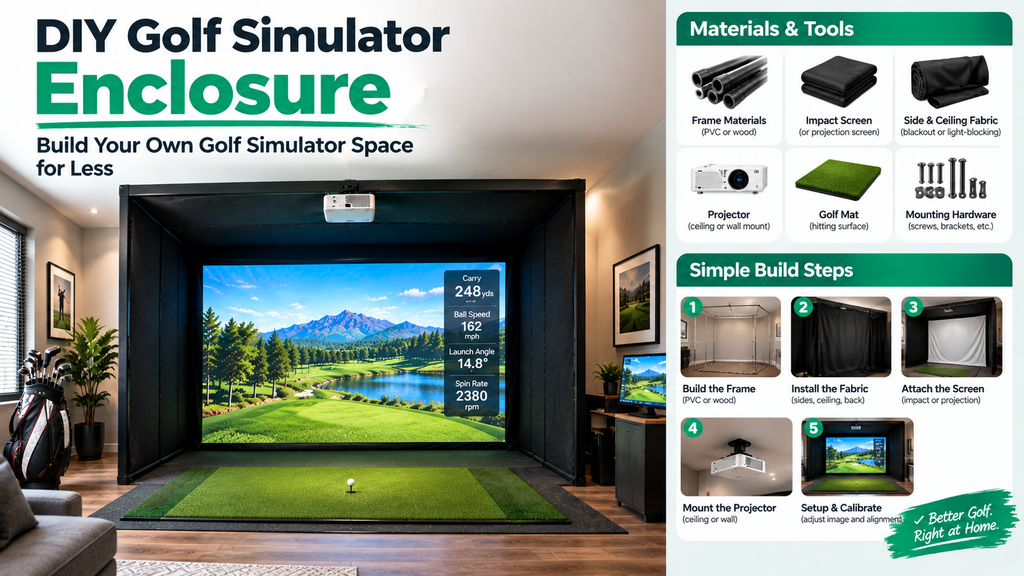
A golf simulator enclosure is the frame that surrounds your hitting area, holds the impact screen and catches mishits. You can build a DIY golf simulator enclosure from metal conduit, pipe or timber for a few hundred dollars plus the screen, or buy an enclosure kit with the screen included for roughly $1,000–$3,500. Both work well; the choice comes down to budget, time and how much you enjoy a project.
This guide shows you how to plan, build and finish a DIY enclosure step by step, with a worked example for a common 10 × 8 foot screen, the materials and tools you need, how to fix common problems, and what the well-known kits offer if you’d rather buy one. For the full home setup, see our guide to an at home golf simulator setup.
Key Takeaways
- A DIY enclosure frame typically costs $300–$1,500, plus the impact screen and side netting.
- Enclosure kits cost roughly $1,000–$3,500, more for premium and custom kits, and usually include the screen.
- Metal conduit (EMT) with corner fittings is the most popular DIY frame; timber works well for permanent builds.
- Size the frame around the screen, leave a gap behind the screen, tension it evenly, and add side netting and padding.
- Most DIY frames take a weekend with two people.
DIY Enclosure vs Kit
| DIY build | Enclosure kit | |
|---|---|---|
| Typical cost | $300–$1,500 plus screen | $1,000–$3,500 (premium kits more) |
| Time | One to several weekends | Several hours to a day |
| Fit to room | Built exactly to your space | Fixed sizes; some customisable |
| Look and finish | Depends on your skill | Neat, designed to match |
| Best for | Handy owners, odd-shaped rooms, tight budgets | Most homes; anyone wanting a quick, tidy result |
What a golf simulator enclosure includes
- Frame: uprights and rails that hold everything.
- Impact screen: stops the ball and shows the projected image. See impact screens.
- Side panels or netting: catch shanks and thin shots.
- Top netting or canopy: catches skied shots, protecting the ceiling and lights.
- Padding or curtains: soften hard edges, reduce bounce-back and noise.
- Projector mount (optional): some kits include a mount on the frame.
Can you have a golf simulator without an enclosure?
Yes. Many golfers start with a launch monitor and a practice net, showing shots on a tablet or TV. You can also hang an impact screen on a simple frame without side panels, but add side netting at least, as shanks and thin shots can damage walls and bounce back. A full enclosure is the safest option for a projected setup.
DIY Frame Materials Compared
| Material | Pros | Cons |
|---|---|---|
| Metal conduit (EMT) with corner fittings | Strong, straight, inexpensive, sold in 10-foot lengths at hardware stores | Needs cutting and deburring; fittings must match the conduit size |
| Steel pipe with clamp fittings | Very strong and rigid | Heavier and more expensive |
| PVC pipe | Cheapest, light, easy to cut | Flexes and sags over wider spans; less durable |
| Timber (e.g. 2x4s) | Easy to build, good for permanent frames, easy to attach padding and mounts | Bulkier; needs to be square and well braced |
For most people, EMT conduit is the best balance of cost, strength and ease. Common DIY sizes are 3/4-inch and 1-inch conduit; whichever you choose, buy corner fittings made for that exact size. Corner connectors are sold by simulator retailers such as Carl’s Place, which also sells complete DIY enclosure kits.
Timber frame alternative
A timber frame suits permanent builds and makes it easy to screw on padding, curtains and a projector mount.
- Use straight 2x4s (pick them by sighting down each board).
- Build the screen frame with screws, not nails, and metal corner brackets.
- Add diagonal braces at the top corners to stop racking.
- Fix it to wall studs and, if needed, the ceiling joists.
- Fit hooks or eye screws for the screen bungees at even spacing.
Before You Start
| Item | Details |
|---|---|
| Time | A weekend: planning and buying on day one, building and hanging the screen on day two |
| People | Two, especially for lifting the top rails and hanging the screen |
| Skill level | Basic DIY: measuring, cutting and using a drill |
| Cost | About $500–$2,000 for the enclosure, including the screen (see the cost table below) |
Tools and materials checklist
- Tape measure, spirit level, speed square and marker
- Pipe or conduit cutter, or a hacksaw or metal-cutting saw (a timber saw for wooden frames)
- Metal file or deburring tool to smooth cut ends
- Drill/driver, stud finder and fixings for walls, floor or ceiling
- Corner fittings (or brackets for timber) and couplings to join lengths
- Impact screen, plus bungee cords or ball bungees
- Golf impact netting for the sides and top, cable ties or carabiners
- Padding: foam, gym mats or heavy blankets
- Step ladder, gloves and eye protection
Example DIY build cost
| Item | Rough cost |
|---|---|
| Frame material and fittings | $150–$500 |
| Impact screen | $200–$1,000+ |
| Side and top netting | $100–$300 |
| Padding and bungees | $50–$200 |
| Enclosure total | About $500–$2,000 |
That compares with roughly $1,000–$3,500 for a kit of similar size. Add the launch monitor, mat, projector and software for a complete simulator.
How much does it cost to build a golf simulator?
The enclosure is only one part. A complete DIY-built simulator, including launch monitor, mat, projector and software, typically costs from about $2,000 to $10,000, depending mostly on the launch monitor. See how much a golf simulator costs for a full breakdown.
Prefer to have it built for you? Find a golf simulator builder near you, or read about professional installation.
How to Build a DIY Golf Simulator Enclosure: Step by Step
Step 1: Measure the room and plan the size
- Measure the space where the enclosure will go: ceiling height at the lowest point, width and depth. See space requirements.
- Choose the screen size first. Pick the biggest screen that fits, leaving room for the frame around it and the gap behind it, and match its shape (16:9 or 4:3) to your projector.
- Size the frame around the screen. The opening should be a few inches bigger than the screen on every side so the bungees have room to stretch. Check your screen maker’s guidance for the exact allowance.
- Decide the depth. The frame’s sides run forward from the screen towards the hitting area. A few feet is common; longer sides with netting catch more shanks.
- Draw it out with every length labelled. Check: the top of the frame clears the ceiling and any lights, and the frame sits several inches to a foot in front of the wall.
Worked example: a frame for a 10 × 8 foot screen
A simple box frame, about 10.5 feet wide, 8.5 feet tall and 4 feet deep, with rails at the top and bottom:
| Part | Quantity × length | Total |
|---|---|---|
| Uprights | 4 × 8.5 ft | 34 ft |
| Width rails (front and back, top and bottom) | 4 × 10.5 ft | 42 ft |
| Depth rails (left and right, top and bottom) | 4 × 4 ft | 16 ft |
| Three-way corner fittings | 8 | |
| Couplings (to join 10-ft lengths for the 10.5-ft rails) | 4 |
That’s about 92 feet of conduit, so buy ten 10-foot lengths to allow for offcuts and mistakes. Corner fittings add a little to each length, so cut pieces slightly shorter than the finished size; the fitting’s instructions say by how much. Your room may need different numbers; the method is the same.
Step 2: Cut and prepare the frame
- Mark each cut with a marker and square, and label each piece with masking tape (for example “upright 1”).
- Cut with a pipe cutter for clean, square ends, or a hacksaw held square.
- Deburr every cut end with a file. Sharp burrs tear netting and screens, and cut hands.
- Join lengths for long rails with couplings, tightened firmly.
Check: lay matching pieces side by side; they should be the same length.
Step 3: Assemble and square the frame
- Build the back (screen) frame first on the floor: two uprights and two width rails with corner fittings, fittings hand-tight.
- Stand it up with a helper, in position several inches to a foot from the wall.
- Add the depth rails and front uprights, then the front width rails.
- Square the frame: measure the two diagonals of the back frame, corner to opposite corner. Adjust until both measurements are equal; then the frame is square.
- Level it: check each upright with a spirit level, and the top rails across their length.
- Tighten every fitting.
Check: push each top corner firmly. If the frame sways, add bracing or fix it to the wall (Step 4).
Step 4: Secure the frame
- Fix the back uprights to the wall with brackets or straps into studs, keeping the gap behind the screen.
- Stop the feet moving: floor brackets, heavy rubber feet or sandbags on the bottom rails.
- Support long spans: if a top rail sags under the netting, add a centre support or use thicker conduit for that rail.
Why it matters: a frame that moves when the ball hits the screen shakes the picture, loosens fittings and can tip.
Step 5: Hang the impact screen
- Attach the top corners first, then the middle of the top edge, then the points between, using bungees or ball bungees through every grommet.
- Attach the sides, then the bottom, working from the centre of each edge outwards so tension is even.
- Tension it until the surface is flat with no wrinkles, but not drum-tight. A screen that’s too tight sends balls back harder.
- Check the gap behind: several inches to a foot between the screen and the wall, more for fast swings.
Check: press the centre; it should give and spring back without touching the wall. More detail in our impact screen guide.
Step 6: Add side and top netting
- Use netting sold for golf impact, not light sports netting.
- Attach it to the frame with cable ties or carabiners every foot or so, starting at the top and working down.
- Close the gaps: where netting meets the screen, overlap it so a ball can’t slip between them.
- Let it hang slightly loose at the bottom; loose netting absorbs balls, tight netting bounces them.
- Add a top net or canopy if your ceiling, lights or projector could be reached by a skied shot.
Step 7: Add padding
- Wrap exposed frame poles within reach of a mishit in foam pipe insulation or padding.
- Pad walls beside the hitting area with foam panels, gym mats or heavy moving blankets.
- Keep padding slightly soft or loose: a hard, flat surface sends balls straight back.
- Finish the sides with enclosure fabric or heavy curtains if you want a quieter bay and a tidier look; hang them so they can move when hit.
See golf simulator padding and netting.
Step 8: Test before full swings
- Hit half-swing wedges at the screen centre and watch where the balls go.
- Aim a few at the screen edges and the side netting.
- Step up to full irons, then the driver.
Check: balls drop near the base of the screen, nothing escapes, and the frame doesn’t move. Then add your projector (see projector setup) and launch monitor.
Fixing Common DIY Enclosure Problems
| Problem | Likely cause | Fix |
|---|---|---|
| Frame wobbles on impact | Loose fittings; not anchored | Tighten fittings; fix to wall studs; weight the feet |
| Top rail sags | Long span; heavy netting | Add a centre support or thicker conduit |
| Wrinkles in the screen | Uneven tension | Re-tension from the centre of each edge outwards |
| Balls bounce back hard | Screen too tight; gap too small; hard padding | Loosen slightly; increase the gap; soften padding; add a baffle |
| Balls escape at the sides | Gaps between screen and netting | Overlap the netting; add longer side netting |
| Netting or screen tearing | Sharp conduit ends or fittings | Deburr ends; cover fittings with tape or padding |
| Loud impacts | Screen close to the wall; no baffle | Increase the gap; add a baffle and wall padding |
Golf Simulator Enclosure Kits
Enclosure kits come with the frame, impact screen and side panels, designed to fit together. Some include a projector mount. Well-known options include:
- Carl’s Place: DIY enclosure kits, impact screens and frame connectors, popular with home builders.
- SIG10 (Shop Indoor Golf): enclosures sold on their own or as part of complete simulator packages.
- Simulator retailers’ own enclosures, from stores such as Rain or Shine Golf and PlayBetter.
Many retailers also sell enclosure kits as part of complete packages; see golf simulator packages.
How to choose the best golf simulator enclosure
- Measure your room and list the largest kit that leaves clearance above, beside and behind it.
- Match the screen shape to your projector (16:9 or 4:3).
- Check the screen quality: quiet, durable, sharp picture.
- Check protection: full side panels and a top canopy.
- Check the frame: rigid enough not to wobble when hit.
- Check projector mounting options if you’ll mount on the frame.
- Read the instructions and support policy, including spare parts and screen replacement.
Cheap golf simulator enclosure options
On a tight budget, a large practice net with side barriers is the cheapest option, though you won’t get a projected picture. The next step up is a DIY frame with a budget impact screen. See cheap golf simulator ideas for more ways to save.
Cages, Canopies and Special Enclosures
Golf simulator cages and canopies
A “cage” usually means a netted frame that encloses the hitting area on the sides and top, like a batting cage, popular for garage practice without a projector. A canopy is the top section of an enclosure that stops skied shots reaching the ceiling.
Retractable enclosures and screens
Retractable screens roll up like a blind, and some enclosures fold back against the wall: ideal for garages where you still park the car.
Outdoor and inflatable enclosures
Outdoor enclosures need weather-resistant materials and secure anchoring. Inflatable enclosures inflate with a blower and suit events. See sheds, outdoor and portable setups.
Building a simulator shed
If you’re building a shed for your simulator, plan the enclosure and screen first, then design the building around them, especially the clear inside height. Check local rules first in our permit guide, and see our golf simulator shed guide.
FAQ
How do you build a golf simulator enclosure?
Measure your room, choose the screen size, build a square frame a few inches larger than the screen from conduit, pipe or timber, fix it to the wall, hang the screen with bungees and a gap behind it, then add side netting and padding and test with easy wedges.
What size conduit should I use for a golf simulator frame?
3/4-inch and 1-inch EMT conduit are common for DIY frames. Thicker conduit sags less over wide spans. Whichever you choose, use corner fittings made for that exact size.
What is the cheapest DIY golf simulator?
A budget launch monitor with a practice net and mat, showing shots on a phone or tablet. For a projected picture, a DIY conduit or timber frame with a budget impact screen is the cheapest route.
Is it cheaper to build your own golf simulator enclosure?
Usually, yes. A DIY frame costs a few hundred dollars plus the screen, while kits cost roughly $1,000–$3,500. Kits save time and come designed to fit together.
Why does my golf simulator frame wobble?
Usually loose fittings or a frame that isn’t anchored. Tighten every fitting, square the frame by matching the diagonals, fix the back uprights to wall studs, and weight or fix the feet.
What is a golf simulator kit?
A ready-made enclosure with frame, impact screen and side panels, sometimes with a mat, projector mount or launch monitor included. Kits for the home and garage are sold by simulator retailers.